Showing posts with label Organization. Show all posts

Tuesday, September 17

Chalkboard front Fridge


I've wanted to do this ever since my first episode of "Good Luck Charlie".
Finally got around to it and I LOVE LOVE LOVE it!


I googled magnetic chalkboard panels that fit a fridge and soon realized they don't seem to make them for a "top, bottom" fridge like mine... 

Which turned out to be a huge blessing because they are kinda pricey! After not finding any to fit my fridge, (and quickly deciding I did not want something as permanent as paint...) I then discovered.....

wait for it....

Chalkboard Contact Paper!!!!!!!!!!!!!!!!

Yes, it deserves that many exclamation points.

This stuff is incredible. It is affordable, it is re-positionable, and the possibilities are absolutely endless with this stuff!

I bought mine at Hobby Lobby (btw- I'd somehow managed to never walk down the particular aisle where the chalkboard contact paper resides, and let me tell you... there is some really cool stuff there! The entire aisle is nothing but chalkboard, white board and cork board stuff. Like, stuff you've never dreamed of before... I wanted it all and ALMOST purchased lots of items I had no plans for whatsoever- BUT, I digress...)


(I had a little leftover after my fridge so I stuck it on my dishwasher. Now no one has to ask... :)


I used 2 rolls for my fridge (about $7 each- but, I, of course, bought them at 50% off ;)
The rolls are like 2'x6' and we didn't really want a pieced line down the center length of the fridge... so we decided to go horizontal working our way down from the top. I did have to piece at the bottom with what was left on each roll, but it looks totally fine. Actually, you can hardly tell the paper is even on the front of my fridge. The black just blends right on in together.

(I must give a shout out to my awesome contact-paper-installer-of-a-husband! He was so much better than me at getting the bubbles out! But don't be scared- it really is very forgiving! The whole "re-positionable" thing means you don't have to freak out if you mess up!) 

Okay. So here are some side notes:

I bought this cute eraser on the very same aisle as the paper, and was pleasantly surprised to find out it was magnetic! But, I have to be honest- I never use it. Baby wipes (which I already have in my kitchen anyway) are SOOO much better. They just catch all the dust.


The whole experience is really a lot less messy than I expected. Grant it, I do NOT leave a bucket of chalk on the floor for my kids to draw pictures as they come and go. I let them draw (usually once a day) then wipe their hands (and the floor) and put the chalk away- which is in a cute little box on my kitchen window sill. :)

I am using regular chalk right now but am super curious about this so-called "dustless" chalk they sell. Also, chalk markers.... which are a little expensive. But maybe I'll splurge and check them out.

I wouldn't recommend this on a carpeted area. But other than that, you could use this paper just about anywhere. I mean, the whole chalkboard paint thing has been all the rave for quite awhile now... but, it's so much more permanent, you know? And so much more work.... so, this stuff is my new fav! :)


Tuesday, June 4

Forward Facing Bookshelves


I've been wanting to do bookshelves like these for a couple of years now... mostly for the storage space/organization... but also because it encourages kids to read more when they can see the fronts of the books. 

I saw some different ideas on Pinterest, and at first, I wasn't sure which kind I should attempt. I almost did the rain gutter version. (Click HERE to check out that project.) The gutter ones are very pretty, but since they wouldn't cut them in store for us we were gonna have to borrow a truck to carry it home.... and we were impatient :D 

We went to IKEA to buy the Spice Racks... but lo, and behold- they were on back order until August. Yeah... apparently there are lots of people like me using THIS idea for them.

So... we decided to just build them with 1x4's and L-brackets.


Finished product:

We ended up deciding the raw wood look was better for Benjamin's room anyhow, because they match his toy shelves.

These shelves are 2' wide. 
We bought 2- 8' boards and cut them in 4 equal pieces. 
We used 4 L-brackets for each shelf- 
2 for connecting the boards, 2 for attaching them to the wall. 
(If you want more support you could add 2 more in the center. 
We were fine just attaching each side since our shelves are fairly small.)


First we had to find our studs, and (working around the light switch,) 
figure out where we wanted the shelves. 
We found that spacing them 14" is plenty 
for even our tallest books. 
(We measured from the bottom of one shelf to the bottom of the next.)

We drew dots at the measured increments and then drew lines across the wall using a level so we could match our boards up. (We drew larger dots where the line intersected with the stud so we'd know where to screw in our brackets.)


I considered using the top shelf for puzzles (so they couldn't reach them all at once :) But, we had so many books we needed all the shelves for them. I plan to rotate them each week so the kids can reach different ones. All of our tiny little board books/baby books are in shallow baskets under Ben's bed. 

Total project cost was about $22. 
The wood was less than $5. The bulk of the cost is L-brackets.
I estimated the rain gutter version would have cost us about $36. (Still not bad...) and the IKEA spice racks would have been around $26 if we had used 6. (Those are 1 1/2 feet wide.)

I need to add that I looked and looked for some type of shelf to buy to make these with. As far I tell, Walmart, Target and quite a few other places around me have absolutely NOTHING like this. So I finally broke down and tackled a DIY... but it was very worth it and didn't take long at all. :)


Thanks for looking!


Thursday, December 8

Making your own All-Natural Household Cleansers (For pennies!)

Lol... don't vintage cleaning ads just crack ya up?

I've wanted to switch to all-natural chemical-free household cleansers for some time now. The only thing stopping me was money. See, I'm a penny pincher... and I coupon. I was getting most of my cleaning products for free or close to it with my couponing... so I just couldn't bring myself to pay (a lot) more money for the natural stuff I saw in health food stores and catalogues.

Well, I've finally gotten to the point where I realize our health is more important than money. I'm tired of holding my breath while I clean, and knowing my kids are inhaling those dangerous fumes.

WELL! I've finally discovered a solution!!! MAKE THE STUFF MYSELF. SO cheap, SO eco-friendly, SO healthy, SO effective.... Am I missing anything?

The thing I use most is an all purpose disinfectant (for wiping down counter tops, toys and baby stuff, laminate floors etc.) So I decided to mix 1 part hydrogen peroxide with 2 parts water, adding a few drops of lavender oil. If you aren't familiar with hydrogen peroxide: it's simply amazing. It kills more germs than Lysol and it's actually safe to ingest. In fact, if you do ingest it, you'll be a little bit healthier. *smile* The Lavender oil is a naturally anti-bacterial as well, and it smells SO nice! You can play around with different essential oils for whatever smell you like in your cleansers.

You know how name brand chemical cleansers "smell good", but if you breathe in deeply it kinda burns your throat? Well, now when I clean I can NOT stop breathing in the smell. There's no burning; it just smells so pure and clean and WONDERFUL! Nick keeps commenting on the great smell as well.

Okay, so I've been researching recipes for other cleansers too and here's what I've found:
(Let me know how they work for you if you try them... also let me know if you have a fantastic laundry detergent recipe. I'm "shopping around" :).... the cheaper to make, the better! 


General Cleansers:
1.Vinegar and Salt: Mix to make a good surface cleaner.
2. Baking Soda: Dissolve 4 tablespoons baking soda in 1 quart warm water for a general cleaner.
3. Baking soda on a damp sponge: Cleans and deodorizes any kitchen or bathroom surfaces.
4. Liquid castile soap and baking soda or Borax: Use in different ratios. Try a little soap and soda/borax with large amount of water for floors, walls and counters. Try more soap, soda/Borax for tubs and sinks and anything that can be rinsed well.
5. Paste of baking soda and water: Makes an effective scouring cleanser.


Disinfectants:
1. Half-cup of borax and 1 gallon hot water: Add a few sprigs of fresh thyme, rosemary or lavender. Steep for 10 minutes, strain and cool. You could also add essential fragrant oils instead of fresh herbs. Store in a plastic spray bottle.
2. 2 tablespoons Borax, 1/4 cup Lemon Juice, 2 cups hot water: Combine the borax and lemon juice with the water in a spray bottle. Use to replace any commercial all-purpose cleaner.


Wood Furniture Polish:
Try a mixture of olive oil and lemon juice. (Always test your mixture on a small out of sight part of your furniture first!)

Glass Cleaners:
1. Undiluted vinegar in a spray bottle
2. Equal parts vinegar and water in a spray bottle
3. 1/2 lemon juice and 2 cups water in a spray bottle

Oven Cleaner:
Sprinkle baking soda all over stuck-on food and grease in the bottom of oven. Spray with water until moist. Continue to spray every few hours keep it moist. Let set overnight. By morning it should wipe clean easily.
(I have to inject here that I bought a commercial oven cleaner a few months ago. I thought I had no choice- had to get it clean somehow... the fumes were SO incredibly bad I felt we should all be wearing hazmat suits. I'm not kidding. I hope this recipe works as well as I've heard it does, but either way: I will NEVER buy that other stuff again!)


Toilet Bowl Cleaners:
1. Baking Soda and Vinegar: Sprinkle baking soda into the bowl, then squirt with vinegar and scour with a toilet brush.
2. Borax and Lemon Juice: Mix enough borax and lemon juice into a paste. Flush toilet to wet the sides, then apply the paste. Let sit for 2 hours and scrub thoroughly.
3. 1 cup borax, 1/2 cup white vinegar: Flush to wet the sides of the bowl. Sprinkle the borax around the toilet bowl, then spray with vinegar. Leave for several hours or overnight before scrubbing.
4.Liquid castile soap and baking soda or Borax: Scrub with a toilet brush.


Drain Cleaner:
1/2 cup baking soda
1 cup white vinegar
1 gallon boiling water
1/2 a used lemon


Pour baking soda down drain/disposal, followed by vinegar. Allow the mixture to foam for several minutes before flushing the drain with boiling water.

Tub And Tile Cleaners:
1. Baking Soda: Sprinkle baking soda just like scouring powder. Rub with a damp sponge. Rinse thoroughly.
2. Vinegar and Baking Soda: Apply vinegar full-strength to a sponge and wipe. Then use baking soda as you would scouring powder. Rub with a damp sponge and rinse thoroughly with clean water.
3. Vinegar: Use 1/4 cup (or more) vinegar to 1 gallon water.
4.Baking Soda: For grout cleaning, use 3 cups baking soda in a medium-sized bowl and add 1 cup warm water. Mix into a smooth paste and scrub into grout with a sponge or toothbrush. Rinse thoroughly.


Porcelain Cleaner:
Rub with cream of tartar sprinkled on a damp cloth.

Plumbing Fixtures:1. To clean stainless steel, chrome, fiberglass, ceramic, porcelain or enamel fixtures, dissolve 2 tbsp baking soda in 1 qt of water. Wipe then rinse.
3. Hard lime deposits around faucets can be easily removed by covering the deposits with vinegar-soaked paper towels. Leave the paper towels on for about one hour before cleaning. Leaves chrome clean and shiny.


Metal Shower Heads: To remove deposits combine 1/2 cup white vinegar and one quart water. Completely submerge the shower head and boil 15 minutes.


Plastic Shower Heads: Combine 1 pint white vinegar and 1 pint hot water. Completely submerge the shower head and soak for about one hour.


Rust Stain and Hard Water Deposit Remover:Apply full-strength vinegar or lemon juice and allow to set until spot disappears, rinse and repeat if necessary.


Pretty sure this goes without being said... but in case you're wondering: just purchase some spray bottles for your homemade cleansers, and label them accordingly! :)
Oh yeah, and I'd recommend using distilled water in your recipes for less residue left behind.

Wednesday, August 3

A tip for Tuesday


Making bows is a fun past-time of mine ever since I had a baby GIRL! :)
On the last trip we went on, Adalynn's bows ended up being
a smashed mess in the zipper pocket of a suitcase.
While complaining about that, my brilliant mother came to the rescue (AGAIN!)
She suggested packing hair bows (or any other accessories you don't want smashed,) in a plastic shoe box or food container like Tupperware.


This pic is for blogging purposes only- I didn't actually pack this many hair bows for my weekend trip.


But I wanted to.


I will SO be using this tip the rest of my life.
Thanks again Mom!

Tuesday, June 21

Amazing Diaper Bag Idea!


Okay. So me and my mom are having a "mall day" on Monday, and I start rummaging around in my diaper bag for the ump-teenth time, looking for something that I cannot find...when my mom says, "You know what you should do? Get a bunch of small clear zipper bags to organize everything in your diaper bag so you find things easier. Actually, if I were you, I'd just use a clear bag as THE diaper bag. You'd be able to see where things are from the outside!"

Did I ever mention how incredibly intelligent my mother is?? :0)  ***love ya mom!***

I'm ALWAYS looking for new ways to organize. For me, organization is a time saver & a stress saver. And quite frankly, now that I have 2 kids instead of 1- it's mandatory. Do you know how frustrating it is to be digging and digging for something while Addy is crying and Ben is simultaneously trying to climb out of his stroller? *smile*
I'm sure you do if you're a mom.

So here's my NEW and IMPROVED diaper bag!!!!
(drum roll, please...)


Cute, stylish, AND organized right?!


I've tried organized things in smaller bags within the diaper bag before- but there was always something that didn't fit or have a place... I dunno. It didn't work that great & got out of sorts every time I used it.

I found this bag in the cosmetic section at Walmart. It came with all the matching zipper bags inside (which fit perfectly of course) for $20. Diaper bags can be pricey, so I consider this a deal!

The only things not in zipper bags are: the burp rag (on top there,) the wipey case and my personal items (wallet, keys & camera) which are all stuck in that left end. Nice thing is, even if my keys happen to slide somewhere, I can see where they went from the OUTSIDE!!

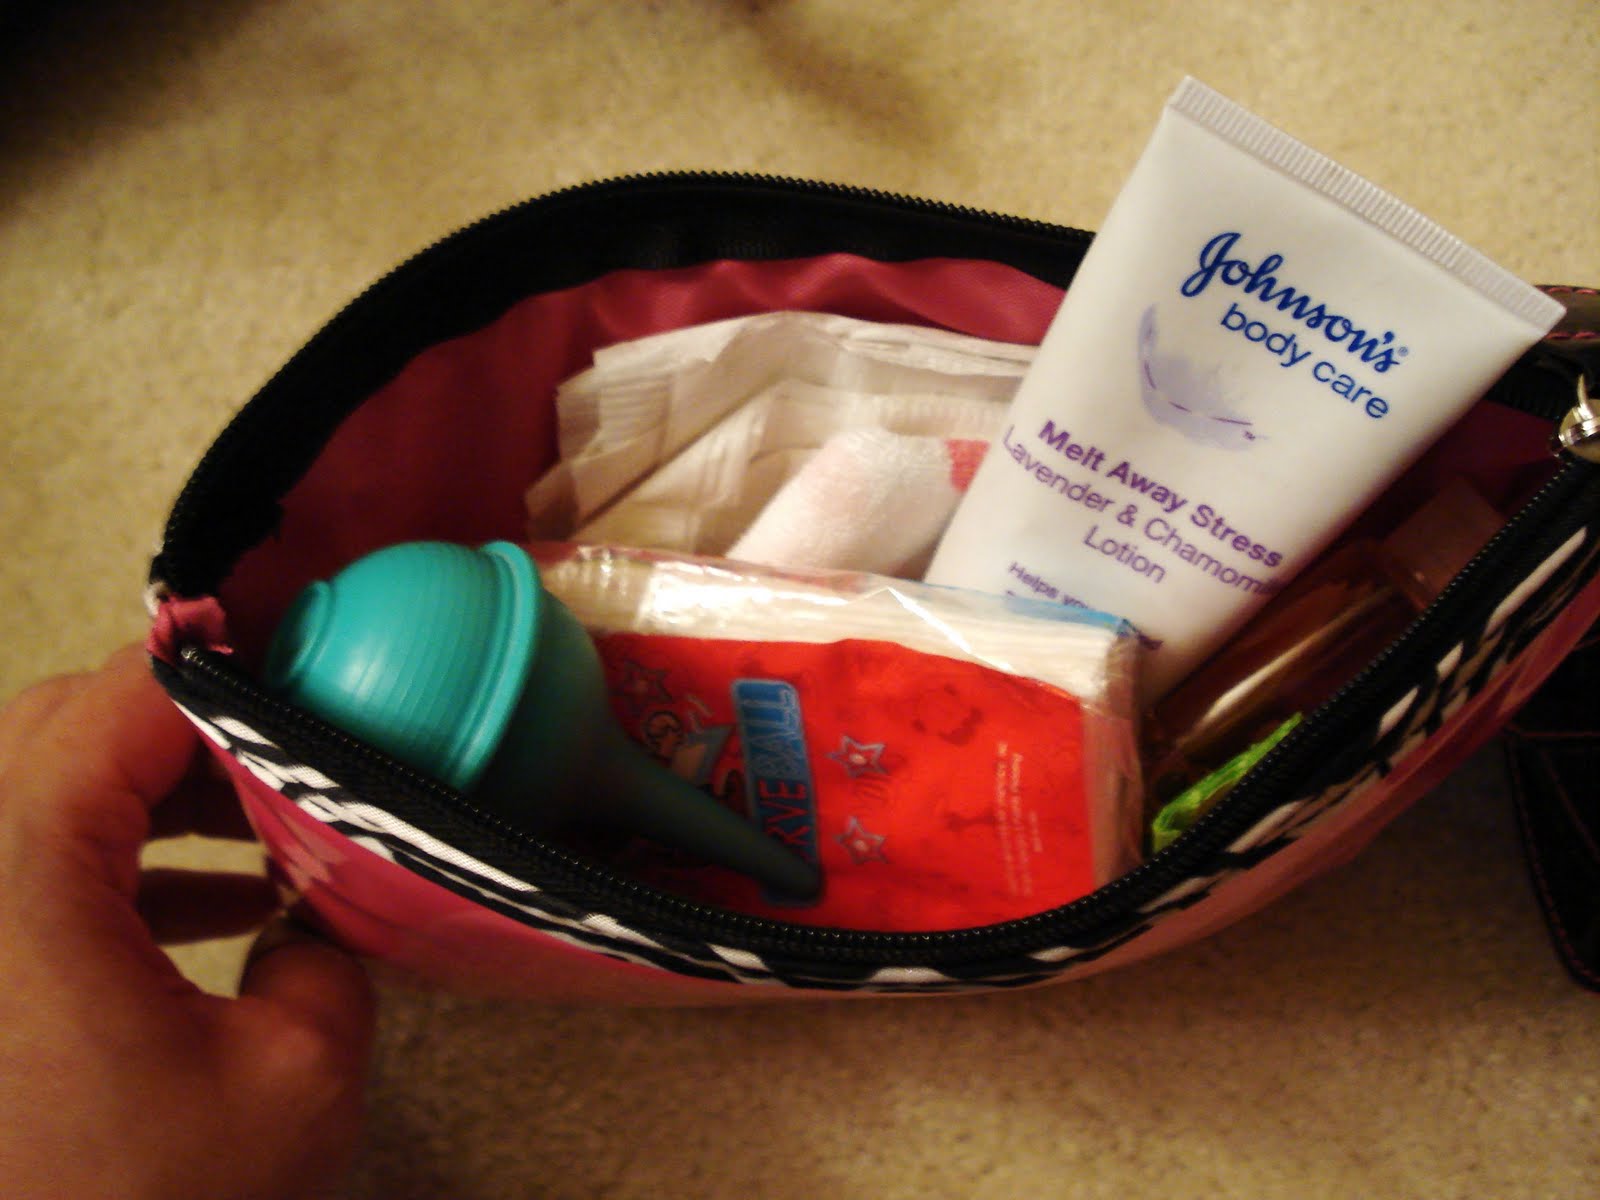
The Toiletry Bag

It contains: all those little items you can't leave home without when you have an infant.

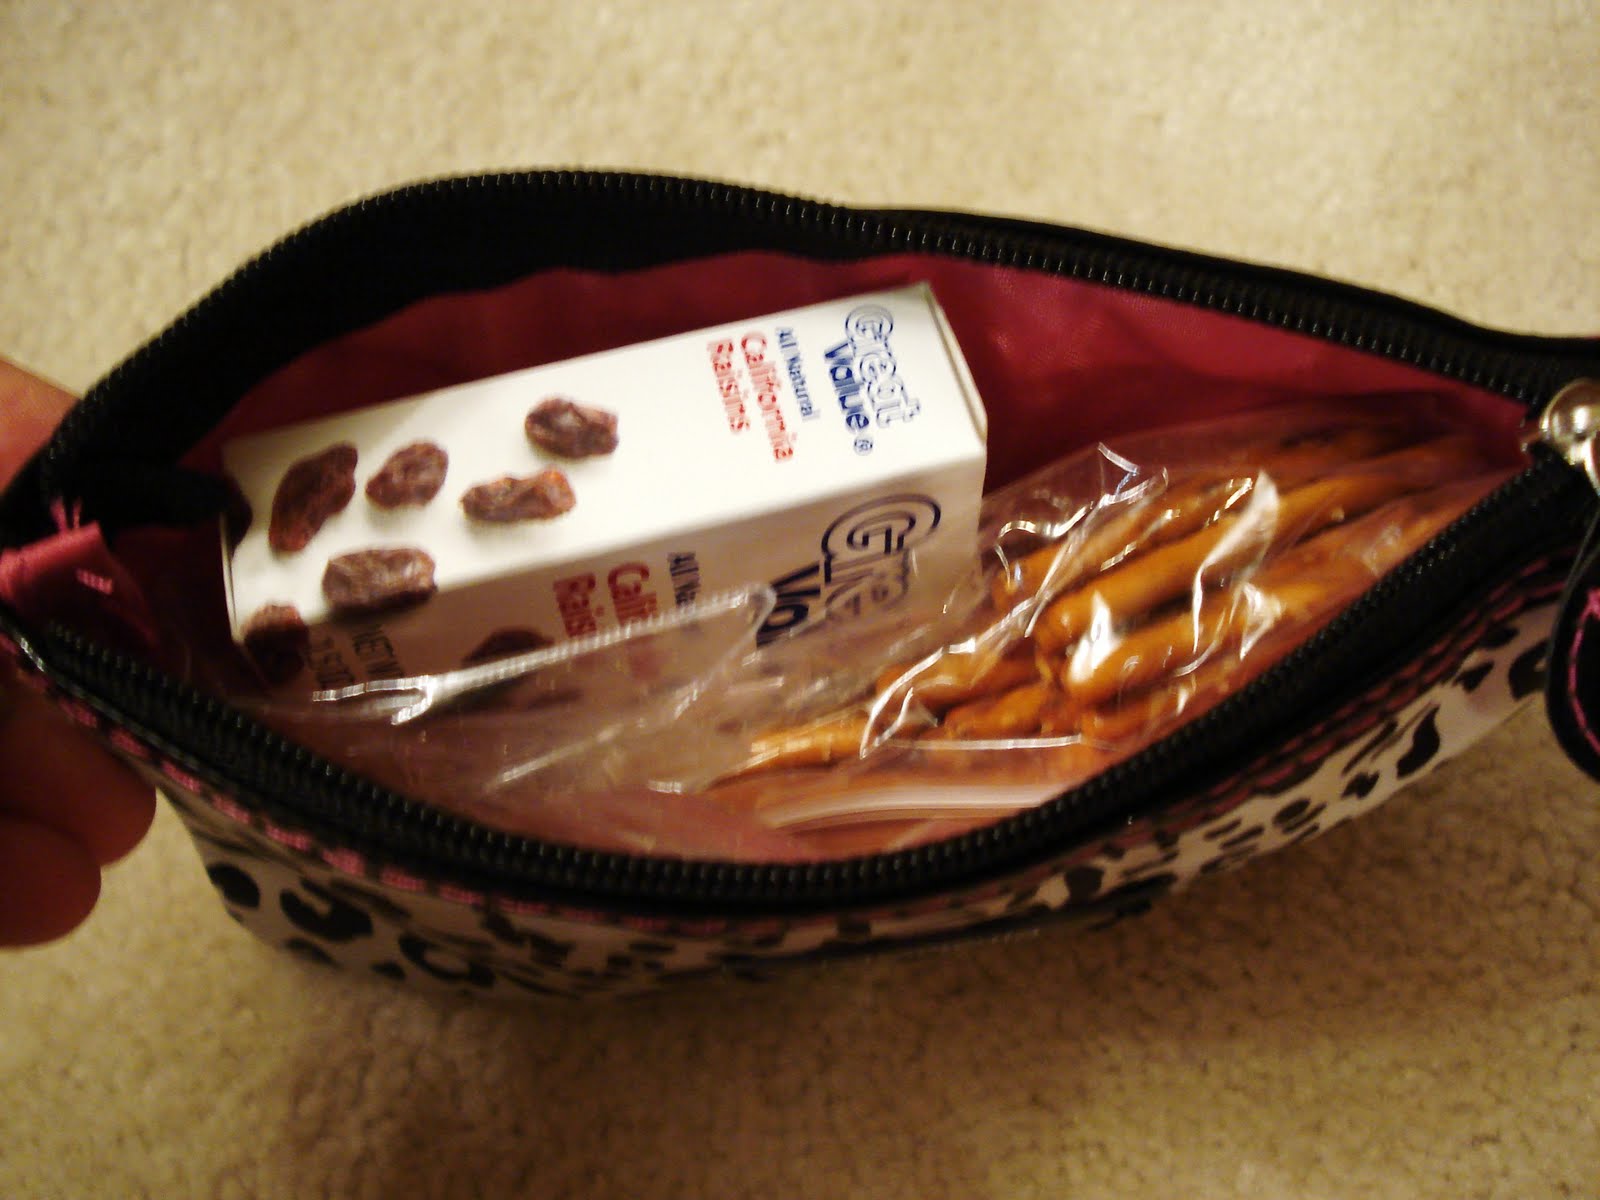
The Snack Bag
(for Benjamin of course)

I rarely buy individual serving snacks b/c they tend to be more pricey. Instead, I divy up a large container of crackers, etc. into these little "snack size" ziplock bags, ahead of time in my pantry. That way, on a busy weekend when I need to replenish the snacks in my diaper bag, I just grab and go.

The "Extra Clothes" Bag
An extra changing of clothes (bow and all) for Adalynn for when she inevitebly spits up or poops on her clothes. :)
Also in here: Benjamin's bib (for going out to eat,) & Benjamin's socks
(to put on him if we go to an indoor playground like Chick-Fil-A or the mall)

***He wears sandals a lot and I don't like him to get his bare feet filthy.***


Let me insert here that I always keep an "overnight" bag for Benjamin in our car with lots of extra diapers, wipes, and clothes- for emergencies! I just don't want to carry all that stuff in every place with me.

That's the burp rag on top of the large zipper bag...

Inside: diapers, diaper ointment & nursing wrap

(I'm not sure why I've been keeping the diaper rash cream in the toiletry bag... makes no sense since I'm always going to use it right after a diaper change. Why open 2 different bags?? But, NO... it IS a toiletry... ha, sometimes my organization obsession overrides common sense :)


So there you have it!
My new life saver- until I find something that works even BETTER! ;)